Archimedia Studios

  • Home
  • Our Company
  • Expertise
  • Blog
  • Contact Us

Bad weather equals good photos for opportunistic photographers

December 10, 2010

by nathan mccreer

Be Patient

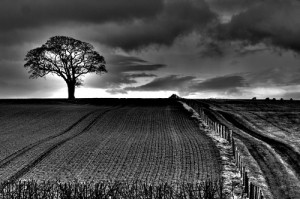
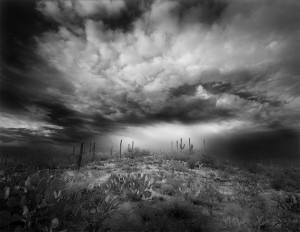
After many rainfalls or storms, comes a spectacular burst of light. Often this light lasts only momentarily, but is worth waiting for. But you’re never going to catch it if you’re still staring out of that window. Part of making good photographs is being an opportunist. Weather reports are easily accessible through the internet, over the radio, and in newspapers, often with detailed information.

You might be able to find out if the cloud cover or storm is about to pass. If not, head out anyway. Yes, it might all be in vain and remain gray and unappealing until nightfall and be a complete waste of time, but what if it isn’t?

If you speak to, or read any book written by a successful landscape photographer, they will tell you stories about how they visited a place dozens of times and waited for hours before getting that one in a million shot. Have a look at that shot. Was it worth the time? Chances are it was. Imagine the satisfaction gained from someone looking at your photo and letting out a breathless “Wow!” Then you’ll be the one telling the stories. A simple way to think about it is that you get out what you put in.

Be prepared

Have you done any research on your subject? Have you visited your location at this time of day before? Do you have a list, or at least a mental outline, of the photos you want? Have you considered the equipment you might need to take? Answering these questions will take you a long way to being able to seize the moment when it does eventually arrive. Instead of fumbling around trying to attach lenses, tripods, filters and any other gadgets that might be necessary, (and I do mean “might”), you will simply be able to step out of your car, or hiding place, gear in hand, and calmly collect the images you’ve been imagining.

A little foresight in taking care of these things beforehand allows you to focus completely on taking photos once in the field. As with anything else, if you can concentrate completely, you’ll likely do a better job.

What’s your purpose?

Think about what you are actually trying to achieve with these pictures. Do you even need blue skies? Many a moody, muted landscape has been created using the worst weather conditions. If you have an interest in shooting black and white images, you could be in for a real treat. Many subjects, such as outdoor portraits, can work better in overcast conditions, enabling you to pick up the lines in someone’s face and add character to the portrait without having to worry about your subject squinting their eyes from the sun or dark shadows appearing over half of their face.

Most successful photography, like anything else, comes from having a clear goal and taking the steps necessary to achieve it. It also comes from working with the elements and planning for various possibilities. Open yourself up to new ideas and you will find that your photography improves markedly.
Filed Under: Photography

The Zone System – Better Black and White Photography

November 20, 2010

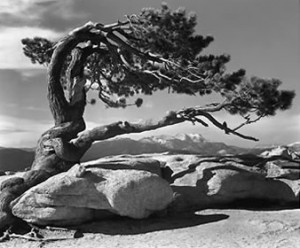
Ansel Adams - Yosemite

In traditional black and white photography, the aim is to present a picture where there is at least one area of the picture which is as dark as your display medium, whether it be printed paper or a computer screen, will allow and another area which is as bright as it is possible to be.

If you have achieved this, the picture is said to have maximum contrast and the image will appear punchy and alive, with very rich tones.

Pictures with too little contrast appear dull and grey and can even be described as muddy. In the days when I worked in a darkroom, I never tired of the tremendous difference between a flat, tonally poor print and that of a full contrast photograph of the exact same negative.

As with all good things in life, one can have too much contrast in ones images. If a picture is displayed with too much contrast, the detail in the lightest and darkest areas of the image will disappear into black and white. While this is acceptable for small parts of the photograph, it can be troublesome if huge swathes of detail are lost into oblivion.

There are, of course, situations where the photographer will intentionally create a lower contrast image, with whites that are not completely white or where the darkest parts of the image is toned in grey rather than in full black, but the key is to be able to get to full range of contrast from your display medium, and then break the rules if you need to do so for visual effect.

Contrast has been taken so seriously by photographers over the ages that Ansel Adams, arguably the finest black and white landscape photographer in American history, devised a system to get the maximum amount of contrast out of every single picture he printed.

The Zone System for Digital Photography

The zone system is basically a technique used to display pictures with the full tonal capabilities of the display medium. Though Ansel Adams applied the system mainly to pictures printed in a wet chemical darkroom, the system is as relevant, regardless of whether you are shooting on a digital camera or on negative, and whether you intend to display on a laptop screen or a wet chemical print.

In the zone system, the properties of the display medium are assessed, and the range of tones that it is capable of producing is divided into ten zones. The first zone, zone zero equates to complete black, as dark as you can get out of your medium, zone one can be described as near black, with detail just about visible in the shadows. Zone two would represent dark grey, while zone three holds the tones in the medium dark area. Zone four is the shades just darker than the average and zone five those just lighter. Zone six will be medium light grey while zone seven is best described as light grey. Zone eight holds all the lightest detail just visible before it disappears into zone nine, pure white.

When Ansel Adams printed his masterful work, he always made sure that each of these areas was represented in the final print. This ensured that his photographs always contained the full tonal range available and gave his images an unrivalled richness and vibrancy.

Filed Under: Photography

Photography Tip: Lighting is everything

November 19, 2010

photo by Katie

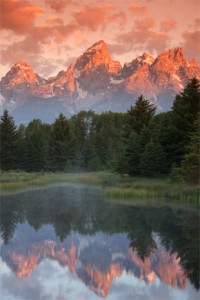
Lighting is everything. Learn to see light and position yourself to capture natural light in its most flattering state.

What do I mean by this? Most people stand with the natural light behind them so that they are photographing into a scene flooded with light. This light is great for a fast expose, but tends to “flatten” a scene because everything has the same intensity and lighting. If you positioned yourself so that you are shooting into the natural light you create a very dramatic “back-lighting” which has much more shape and form.

Try to set up the composition in your view finder so that lighted areas over lap shadowed areas. This will create a wonderful sense of depth in your photo. Overlapping will also create strong contrast in the composition and tends to help the sense of form in your picture. Taking the same shot with different exposure settings will also drastically change the quality of light in your photo. It is a good practice to take several different shots with under exposed and over exposed settings to make sure you will return to the studio with at least one shot perfectly exposed.

Look for things that can add character or drama to your photo. Directional lines help create a sense of movement in your photo. Position yourself to take pictures with strong visual lines that travel through your picture. This means that the line should enter from one side of your picture and leave the photo on one of the three other sides of the photo. Diagonal lines are the most productive for drawing the viewer into your picture and creating depth. Lines can also be made by changes in light (light to shadow), the edge of two objects meeting, tonal changes and warm to cool changes.

Filed Under: Photography

Black and White Photography a new reality!

November 17, 2010

Black and white photography is a rewarding and challenging field of artistic photography. Even people who don’t care about photography can find themselves drawn to a great black and white image. As a photographer, black and white can allow you to discover a whole new character in a familiar subject. For many digital photographers, black and white photography is nothing more than colour photography converted by software. It is a matter for your own judgement whether this is effective for your photographs.

Often the image you assume will convert beautifully to black and white will prove a disappointment; sometimes a photo you never imagined will surprise you. However, most serious photographers will tell you that the best black and white photos are taken when the photographer deliberately sets out with black and white images in mind. This creates an entirely different mindset in terms of how you choose and approach your subject. You may, for example, start to see potential in subjects you would never normally consider for colour photography.

If you have never had a serious go at black and white photography, here are a few simple tips to help you get started.

Filed Under: Photography

The Depth Illusion in Landscape Photography

November 11, 2010

One of the creative problems inherent in all photographs is that they’re flat.

Photographs exist in only two dimensions–they have height and width, but no depth. While a landscape may spread across miles, your photographs are only as deep as the paper they’re printed on. The lack of a third dimension means it’s up to you to create a believable illusion of distance in your photographs.

Creating A Sense of Depth

While you can’t get such intense a three-dimensional experience from an ordinary photograph, there are some visual tricks (also known as “depth cues”) you can exploit to enhance the sensation of distance in your photographs. Knowing how depth is created is particularly useful in landscape photographs because one of the things you’re trying to relate is the physical space involved.

Linear Perspective

One of the simplest and most direct ways to create a sense of distance in a landscape is to include a leading line, a cue that artists refer to as linear perspective. Lines work best when they start near the front edge of the image and go to the far horizon (as in  the desert highway photo) and conclude at a single point (“one point” perspective). Highways, fences, rivers, and telephone poles are all things that can take the eye on a deep journey into your image.

Lines are like a siren call to the eye and they beg the eye to follow. It’s hard to look at a photograph that includes a strong lead-in line and not trace its path–it’s the visual equivalent of eating just one potato chip–tough to do!When these lines are combined with what’s calledl a “single vanishing point” the depth illustion gets even stronger. The vanishing point is created whenever all of the lines in a scene appear to be focsed on a single spot in the distance.

Filed Under: Photography

  • « Previous Page
  • 1
  • …
  • 5
  • 6
  • 7
  • 8
  • 9
  • Next Page »

Delivering Customer Experience Excellence

Let's give em' something to talk about!

Contact Us

Copyright © 2025 · Archimedia Studios · Privacy Policy