Archimedia Studios

  • Home
  • Our Company
  • Expertise
  • Blog
  • Contact Us

The 50mm F1.4 lens a magic bullet for low light photography

February 15, 2011

Being able to effectively capture a scene in dimly lit situations (or at night altogether) is one of the toughest things to do in photography. Even if you have a flash, you have to be careful when firing it if you don’t want to simply blow everything out and ruin the “mood” and “feel” of a night shot. The most common problems with night images are : too much blur, too dark of a shot overall or too much noise in the shot. How do you solve those issues? It obviously depends on the camera and accessories you’re using, but one surefire way to make your existing DSLR entirely more capable at night is the purchase of one single lens. The 50mm F1.4 is as close to a magic bullet as there is in the photography world.
The 50mm F1.4 has a lot of things going for it. For one, it’s available for nearly every DSLR out there. You can find dedicated versions (either first-party such as Nikkor or third-party like Sigma) for Nikon, Canon, Sony and Olympus DSLRs, with plenty of aftermarket solutions out there for even more brands. Secondly, it’s incredibly small. Thirdly, it’s relatively cheap by FX (or full-frame) standards. And finally, the shots you can get from this lens are truly amazing.

This lens can “step down” to f/1.4, which is a fancy way of saying that it can allow a flood of light in compared to most lenses, which can only step down to f/3.5 or so. When you’re shooting with limited surrounding light, having the ability to let your lens pull more light in from practically nowhere is vital.

This allows your shots to be brighter, your shutter speed to be faster (which lessens the chance of unwanted blur) . The 50mm aspect is also important; this is not a zoom lens. It cannot be zoomed at all. If you aren’t familiar with “prime” lenses this will probably be strange to hear, but you literally have to walk forward and back while holding the camera to get closer / farther from your subject. 50mm, however, is a solid distance that’s useful in the vast majority of circumstances.

Using the 50mm F1.4 at night is pretty simple. Regardless of what DSLR body you have, try setting the aperture down to f/1.4 (using Aperture Priority or Manual Mode) and firing a few test shots. Compare that to shots with the aperture set at f/3.5 or higher, and you’ll notice an immediate impact. The flood of light that is allowed in by the F1.4 lens is really incredible, and in many cases, it allows a shot to be taken that would never be possible otherwise. Of course, all of this is assuming that you’re trying to avoid using a flash in order to retain the mood of your scene; lowering the aperture all the way to f/1.4 is simply an alternative to using a flash, and it’s one that natural light lovers greatly prefer.

Owning this lens most definitely isn’t the only way to take low-light shots. You could use a flash, purchase a new body with a higher ISO range  or move your shot into a place with more external light. But if you’re unable to move your shot , you aren’t willing to spend thousands on a new DSLR body and you aren’t fond of how a flash distorts the vibe of a night shot, there’s hardly a better and more affordable alternative than the 50mm F1.4. For Canon owners in particular, there’s a 50mm F1.2 that allows even more light in, but of course it’s over four times more expensive; the 50mm F1.4 for Canon bodies is around $350 on the open market, whereas the F1.2 version is over $1,600. It’s hard to justify that increase.

While the average 50mm F1.4 lens will cost around $350 – $400 regardless of what brand or body you’re buying for, there’s a bargain alternative even to that. Many companies also make a 50mm F1.8 lens, which allows nearly as much light in, but not quite as much. The good news is these are usually around half as expensive as the F1.4 variety, but in my experience, it’s definitely worth saving up and getting the F1.4. It’s a lens that’ll never leave your collection, and will likely follow you around for as long as you’re into DSLR photography. $350 or so is a low price to pay for the ability to take blur-free images in dimly-lit restaurants, at indoor sporting events and in concert venues, not to mention millions of other after-dark opportunities

Filed Under: Photography

Black and White Photography….the art of

January 30, 2011

Below is an instructional presentation of  key elements, tips and techniques for taking  great Black and White Photographs.

http://vimeo.com/19360157

Filed Under: Photography

Photographing Concerts without a Pro Camera

January 15, 2011

A very common question from a variety of people is how to best shoot a concert with only a point & shoot camera. First let’s break it down into the facts of the situation:
  • Most venues will not allow cameras with detachable lenses, meaning you are limited to a compact camera
  • If you are attending a rock concert, you will want to have a smaller camera anyway just for ease of carrying
  • No matter how bright the lights appear on stage, you are shooting in a low light situation
  • In addition to low light, you are also shooting in lights that are constantly changing
  • You want to avoid using flash whenever possible
  • You are shooting what are often fast moving targets
  • In the pit, you are going to be bumped and pushed around

The reality is that your average point & shoot camera, which usually works on automatic settings only, isn’t going to cut the mustard. In order to stand a chance at getting some decent shots, you will need to step it up to a point & shoot with manual settings. These cameras will at minimum run in the $200-400 range. Examples of these types of cameras are the Panasonic Lumix DMC-ZS5, some of the newer Canon PowerShots and the Nikon P100.

A point & shoot with manual options will have a dial with the letters M, S, A, P plus whatever other features that particular model offers. Why do you need manual setting? Because in a concert setting the automatic functions will either make your camera go hey  there’s no light, I need to use a super slow shutter speed! Or it will get hit with a random spot light and say , wait!  I need to close up that aperture! As a result, you will usually get crummy photos.

Here we go. Camera instruction book in hand, set your camera to M. Pick something in your surroundings, preferably in low light that you can use to test it out as you go. Use the instructions to find where on the camera you can adjust the F-Stop (also known as the Aperture), shutter speed and ISO. The F-Stop defines how much light gets to the camera’s sensors. A lower number means MORE light. A higher number means LESS light. The shutter speed is exactly what it says and it will always be depicted in seconds, i.e. 1/125 seconds. The ISO is how sensitive the camera will be to light. A high ISO means greater sensitivity to light, but it also means more grain (those ugly little spots all over the image).

For the average concert, try using the following settings: F/3 or 4 (as low a number as I can go), 1/125 shutter speed and ISO 1600. I would also choose to force the flash off. Check the instructions on your camera for how to do this. Now, play with your chosen subject matter  and see what happens when you adjust one setting at a time. Try taking the aperture to f/5 or f/6. What happens when you drop the shutter speed to 1/60 or raise it to 1/200. What about ISO? When you change it, how big is the difference in the brightness of your photo and how much grain can you see?

For the most part, I would recommend jacking up the ISO as high as it will go (usually 1600 on a point & shoot) and leave it there. Unless you’re trying for a photo worth blowing up to poster size, you won’t mind a little grain. You’ll usually find that you will also keep the aperture as wide open as possible. Most point & shoots go to F/4 or if you’re lucky F/3.5. That leaves your main adjustment at show time to shutter speed. Some of that will be personal opinion. Do you want to get as bright a photo as possible with motion blur or do you want to capture a clearer shot that is darker? It’s a tough call and I recommend doing some of both at a show. You couod try to shoot at a range between 1/80 and 1/160, depending on light and movement. Practice using your camera beforehand so you know how to adjust those settings quickly, even in partial darkness.

A more advanced tip: Many cameras will also have a setting for metering. Simply put, this is a measure of the color and light present in the view finder. The standard setting usually samples the whole field of view, which will vary greatly at a concert. If possible, set your camera to “spot meter” mode. Then center that spot on something close to flesh tone as you take the shot. It will help how your color balance turns out. Good examples are the artist’s face or an acoustic guitar. But part of a concert is the cool light show so there’s no harm in capturing that as well.

An important basic technique is to make sure you rest your arms on the barricade (or your friend) and hold the camera as close to your body as possible. This limits camera shake. And make sure your camera comes with a wrist strap. If you just shelled out $400 for a new camera, you don’t want it to go crashing to the ground when a crowd surfer lands on your head.

If you are shooting in a club with very low lighting, or worst of all the evil red lighting, you’re going to have a hard time. If the venue or artist will let you get away with using flash, use it sparingly. It’s distracting to the rest of the audience and it’s  blinding to the band.

As always with photography, practice makes perfect!  Longer term, if you are passionate about photography, we would always recommend stepping up into the DSLR category of cameras.

Filed Under: Photography

How’s your Diopter?

January 10, 2011

Have you ever looked through the eyepiece of your DSLR and thought things just weren’t  in focus?  Or perhaps you wear glasses and find they get in the way, but you need them to frame your shot properly?

Did you know there is a little dial called the Diopter Adjustment?  This may seem basic for those of you already in the know, yet I have received enough questions and pointed out this miracle adjustment to enough people that I’m hoping this post will help just one of you out there enjoy your camera all the more.

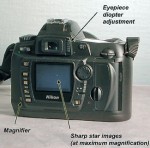
Most brands of DLSRs have a dial of some type to the right of the eyepiece.  Nikon’s can be big or small and obvious, Canon’s is more discrete (especially with the eyepiece cup mounted).  They function the same on both systems.  In essence the diopter adjustment knob works as a lens switching from near to far focus.  It does not effect the focus circuitry of the camera as it is after the auto-focus mechanism.  It only effects how your eye picks up the image.

It works just like the device an eye doctor puts in front of you when checking your vision.  That device has lenses of various concave and convex curves to adjust for nearsightedness and farsightedness.  They adjust for an eye that can’t focus at a reasonable distance, such as for close objects like reading this text.  That little dial on a camera typically has an adjustment range of -3 to +3, with 0 being nominal 20/20 vision, more or less.

If your eye-site is anything less than average (essentially what 20/20 is telling you), this knob will be your best friend to help shoot better photos, especially if you attempt to use manual focus.  To set the diopter correctly, you will need to set your camera on something solid, like a tripod, and point it at something flat with enough texture to be easily seen.  Press your shutter release halfway down to force your camera with auto-focus.

This test relies on the idea that your camera focuses properly, obviously.  Without moving the camera, turn the diopter control until (with or without glasses) the image is in focus to your eye.  That is all there is to it!

I know it seems simple, but sometimes even a small adjustment for those who think they have average eye site can be helpful.

Filed Under: Photography

What Not to do in Portrait Photography

January 6, 2011

1) Never shoot your subject head on! Did you know when you photograph a person with both of their shoulders and toes pointing at you, you are creating a very unflattering image? The body position creates a block to the flow of light. The broad shoulders add at least 10 pounds to your subject. If you are photographing a quarterback or linebacker, then go for it, but if not don’t do it! Instead, turn your subject at an angle away from the camera. If the head angle is correct, you should not be able to see the subject’s far ear.

2) Never have your subjects face into the sun! Why…squinting!  Putting the sun behind your subjects provides a nice hair light and gives depth to your portrait.

3) Do not shoot up the subjects nose! You usually want the camera to be slightly above looking down on your subject. It is also ok to be the same height. Watch closely when framing your image.

4) Avoid large whites of the eyes! You want the subjects iris to be in the middle of their eye. Look at your subject. Ask them to keep their face toward you but look to the right with their eyes. Now all you see is white. That creates a very poor image. If you need to move your subjects head in off camera direction, have them focus on a mid point in front of them or gaze back at you with the eyes.

5) Never pose a subject so close to a background you get a hard black shadow. Most people think if they are not using flash, that shadows upon backdrops are not an issue. That is not true. Our own bodies will cast a shadow from the sun. It is important to let that light wrap around your subject to create a softer light. When you can, pull your subject 6 feet or more away from the backdrop.

6) Do not put your subjects in weird uncomfortable poses! Chances are if it doesn’t really “look” natural it’s not!

7) Avoid objects in the background that ruin your image! You framed your portrait, took the time to get the body angles right and the expression, then you take the shot. If you are only focused on the subject, you might miss the tree or flagpole that is growing out of the top of their head! You may or not be able to photo shop it, so get it right the first time and notice your background space. Is it ok?

8) Avoid glass glare! First, kindly ask your subject if they feel ok taking some shots without the glasses. If the do not where them all the time, it will work. If they wear them all the time or if their eye focus or squinting happens without them keep them on! If you have control over the lighting, take them outside in the shade and use a reflector. If you are indoors, bounce your flash from the ceiling or nearby wall to avoid the glare. If you are not able to bounce. Shoot from a bit more of a higher angle and ask the subject to sit or stand up straight, lean forward slightly, and maybe lower the chin a tiny bit. Do not lose the neck; if you do you are shooting too high.

Filed Under: Photography

  • « Previous Page
  • 1
  • …
  • 3
  • 4
  • 5
  • 6
  • 7
  • …
  • 9
  • Next Page »

Delivering Customer Experience Excellence

Let's give em' something to talk about!

Contact Us

Copyright © 2025 · Archimedia Studios · Privacy Policy