Archimedia Studios

  • Home
  • Our Company
  • Expertise
  • Blog
  • Contact Us

Get to know the F/16 Rule

July 11, 2011

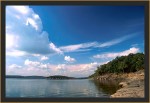
For a lot of us, landscape photography is one of our favorite past-times.

It can get a little frustrating if we’re not producing the standard of shots that we would like to however.

Luckily, there’s a quick and easy rule that can save your daytime landscapes (or any other daytime shot for that matter), at least in terms of exposure and light.

It’s called the f/16 Rule and is sometimes known as the Sunny 16 Rule.

Quite simply the Sunny f/16 Rule states that: On a bright sunny day, with camera aperture set to f/16, the shutter speed will be 1 over the ISO value. eg when using ISO 100 , aperture set to f/16 the shutter speed will be 1/125 (closest to 100).

So if you were using ISO 50 shutter speed would be 1/60, and when using ISO 200, shutter speed will be 1/250.  You get the idea. From this information you can derive other combinations that give the same exposure eg (f/16, 1/125s), (f/8, 1/250s), (f/5.6, 1/500s) etc. Less and less people tend to use this rule due to cameras with auto exposure etc, but knwoing and understanding this rule is useful to have as a starting point to roughly calculate exposures – cameras sometimes get it wrong!

In bright sunlight, it is fairly easy for a camera’s light meter to be thrown off by light colored or shiny surfaces.  For this reason, many professionals rely on the Sunny f/16 rule in these conditions.  The rule  works well with both film and digital photography.  After you become comfortable using the basic Sunny f/16 Rule, you can start  making  adjustments in exposure for sidelight (+1.0 EV), and backlight (+2.0EV) in the photographs you make in bright daylight.

Filed Under: Photography

Keep your Camera Cool!

July 7, 2011

The summer photography season is upon us and to help us take the best photographs possible, whether at the beach, on vacation or the countryside, it is important to keep your camera cool!

Digital cameras don’t like heat and humidity. Most DSLRs come with the recommendation that they work best between 0 and 40 degrees C. (32 – 104 degrees F). It is important to remember that. Keeping your camera cool (or more specifically your image sensor) will help prevent photons (which become more active with higher temperatures) contaminating photosites on your sensor. When an image sensor heats up, colors may not be accurate.

We recomend that you don’t leave your camera where it will get hot like in your car or in a bag in the sun.

When it comes to humidity, if you have a digital SLR, don’t change lenses when you go from an air-conditioned area into humid conditions. If you do change lenses, condensation can build up on the filter over the image sensor and fog your pictures. If your lens and viewfinder fog up, you can wipe them clean with a lint-free cloth or wait until they clear up.

Filed Under: Photography

The Secrets of Food Photography

June 22, 2011

Food Photography is a business all unto itself.  It is used in commercials, print adds, posters, menus, for packaging, cookbooks, and recipe books.

We have all  noticed that some foods which you see on print and media advertising look great, then you go to the restaurant ,order it and somehow it looks different? This is because there are several tricks that photographers use to enhance appearance, and we are not referring to Photoshop, although that is also heavily used.

Most ingredients are carefully arranged by a food artist/stylist and ingredients are cut by hand to precise standards all to make them ever so more appealing.

  • For dishes to look fresh, for sodas or drinks to look refreshing, water mixed in with glycerin or other wetting agents is constantly sprayed as a fine mist unto soda can, glass or the product itself. Little bubbles that seem to last forever in the shot of a cold refreshing soda or drink are made by applying small drops of soap liquid.
  • Dishes, especially soups, are propped up; use of conclave dishes that raises the contents of the dish.
  • For any dish that is supposed to be served hot and consumed as such, the number one tool used is dry ice to give the effect of smoke emanating from it.
  • Nebulizers are also heavily used to create steam.
  • Products that are presented in such as way that you wonder why it does not fall of the table. They are nailed, glued or screwed into place.
  • The use of artificial props is also very common. Things like plastic ice cubes, fake cakes, fruits are commonplace.
  • Most foods are prepared on site just before being photographed, so they always look tempting and fresh. Meats and vegetables are usually undercooked since cooking them fully browns them too much to look appealing.
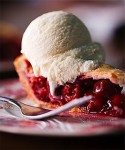
  • The studio can get very hot due to the lights set up. Products that are required to be kept cold, such as ice cream are not really made from “ice cream” but of lard for the shoot. Hungry yet?
  • The secret of Cereal ads is in using heavy cream so that the cereal won’t  become soggy or sink to the bottom of the plate.
  • The shinny fresh picked appearance  of fruit is done by misting them with a water glycerin mixture along with a healthy application of wax.

One of our favorite places to obtain “Food Props” is  TrentGrove Studios.  Check out their products, you will be amazed!

Filed Under: Photography

Cover up that Camera!

June 16, 2011

Shooting on rainy or snowy days can result in some amazing images but also in accidental damage to your equipment. Whether you do nature or street photography, limiting yourself to getting out on dry days can be very frustrating.

Probably  many of you had  been using makeshift plastic covers from bags, shower caps, etc. They work in an emergency situation but, to be honest, they are not always a dependable solution to protect your expensive gear

We have a recoomendation for you…the Storm Jacket!

Here is the scoop: The Storm Jacket is made of AquaNylon fabric and features a bungee draw string on each end. It fits securely over your lens cap and stays in place. The other end also features a draw string which can be pulled tight between shoots when walking around on a rainy or snowy day.  The difference between the standard and pro models is the ability to use a tripod with the pro model. The Pro Storm Jacket has the added feature of a Velcro opening on the bottom to allow for the mounting of a tripod or monopod.  We also recommend the pro version if your camera strap connects to you tripod socket.

– The Standard model comes in five sizes (from 11” to 31” or 27.9 cm to 78.8 cm), in yellow, red, black or camouflage.

– The Pro model comes in four sizes (17” to 31” or 43.1 cm to 78.8 cm) in black or camouflage.

In order to choose the length you need, you just measure the length from the front of the lens cap (zoom fully extended) to the rear of your camera and add 2 inches to that number.

If folds flat, weighs almost nothing and comes with a small zippered pocket that can hook on to your belt or camera bag. The only drawback we can think of is that is it not clear. There are clear covers available out there but they are definitely not as durable as the sturdy fabric used on the Storm Jacket.

Prices range from $36-$59 (depending on size)

You can further check this product out with the links below:

Vortex Media

B and H Photrography

…

Filed Under: Photography

Have some fun with Forced Perspective Photography!

June 2, 2011

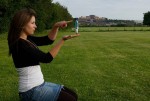
Did you ever wonder how did they make Frodo look so small next to Gandalf? This technique is frequently used in filmography, photography, advertising and art in general. In order to show the contrast between the sizes of objects in a picture the “forced perspective” technique is used. Some photographers choose this technique for their photos as well and it is really successful.

There is no need to use editing softwares or a professional camera, because you can use your imagination by creating outstanding effects with the right angle of the camera and the way you place objects in a picture. You can create an optical illusion by making your objects look bigger or smaller than they actually are. Make the Eiffel Tower stand on your hand or lean on the Tower of Pissa. You can create pretty amazing and unique shots by using this technique.

See more examples

Give it a try, be creative and have some fun!

Filed Under: Photography

  • « Previous Page
  • 1
  • 2
  • 3
  • 4
  • 5
  • …
  • 9
  • Next Page »

Delivering Customer Experience Excellence

Let's give em' something to talk about!

Contact Us

Copyright © 2025 · Archimedia Studios · Privacy Policy