Archimedia Studios

  • Home
  • Our Company
  • Expertise
  • Blog
  • Contact Us

5 Lighting Still Life Tips

September 14, 2011

Lighting is the single most important element of “Still Life” photography. The way a photographer uses light for still life will add mood, give context, provide interest, and ultimately, create a dynamic still life photograph. Lighting for still life is not complicated. In fact, stick to these 5 tips, and you will nail your still life shots every time.

1. Use an simple backdrop: Wrinkles and ridges in a still life photograph – unless a part of the setting – will be distracting to your main subject. Be vigilant about keeping your backdrops smooth and simple.

2. Make your lighting contrasty: Whether you are using strobes, speedlights, or LED’s, it’s important that your “ratio” from one light to the next is varied. The main light should be strongest, and the second light should simply provide a nice fill.

3. Light directionally: Side light is always most effective for bringing out texture and creating dynamic variation between the highlights and shadows. Whether rings, or florals, side light will enable you to give dimension and depth to your still life imagery.

4. Pay attention to your angles: Two things to think about when faced with a studio lighting scenario. a). The position of the lights to your subject and b). the position of your subject to the camera. Side light will give dimension, but so also will the angle at which you take your shot [ie. side, above, below, etc.]. Don’t be afraid to experiment and change up angles. A photo is most interesting when you give a new perspective to something that is ordinary.

5. Light for shape: We see life 3 dimensionally. For this reason, the most dynamic photographs are the ones in which the audience could walk into the scene, or reach out and touch the subject. Lighting for shape will be most emphasized by side light, when your highlights spread along the edge of your subject and add that 3rd dimension.
Filed Under: Photography

Should you use a softbox, or an umbrella?

September 4, 2011

Should you use a softbox, or an umbrella? Even though they serve similar purposes, which is to provide a larger light source (thereby softer light), there are several key differences between a softbox and an umbrella.

Softbox

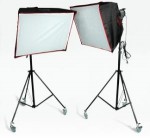
This is the ideal light shaping tool for portraits, because of its versatility in controlling light spill. If you are shooting inside a small room, a softbox enables you to control the spill of light. This means that the subject (the person or object you are photographing) is illuminated in soft light, while the background (walls/ceiling/floor) receives minimal, if any, light spill or light contamination. This is useful for shooting portraits that require a darker or even pitch black background. Yes, you can even create a pitch black background without the use of a black backdrop.

A softbox makes creating flattering portraits very easy. You can use it as a key light, fill light or even a hair light. It all depends on the lighting conditions at the location you are shooting.

There are several types of very portable softboxes that you can get. Get the largest one available, as it produces the softest light.   The softbox has 2 baffles to filter and soften light even further.

Umbrella

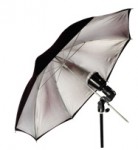
The umbrella’s distinct advantage is portability and mobility. You can bring several umbrellas on an outdoor shoot without any inconvenience. When opened, they provide beautiful soft light, by converting your light (speedlight or a more powerful monolight with battery pack) to a larger light source.

What the umbrella lacks in comparison to a softbox is control of light spill. When used indoors, an umbrella lights up a large part of the room, decreasing your control over how dark your background can be.

There are also different types of umbrellas.

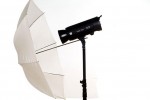
A shoot-through is a translucent white umbrella which your light shoots through and onto the subject. The umbrella shaft is pointed away from the subject, thereby reducing any chances of it accidentally injuring your subject.

The other type is a reflective umbrella, where your light shoots into, and then bounces back onto the subject. This type of umbrella inevitably has its shaft pointing at the subject, so you can’t really go in as close as a shoot-through umbrella would allow. The closer you get to the subject, the softer the light. As the light wraps around the subject, it reduces harsh shadows.

Filed Under: Photography

It’s not what you look at it’s what you see…

September 4, 2011

“It’s not what you look at that matters, it’s what you see.”

– Henry David Thoreau

While Thoreau did not say this about photography, it’s about the best advice you can give to someone in our profession.

Photography is not about pressing a button on a camera. It is about telling a story — communicating what you see when you look at your subject.

Same Subject, Different Stories

Different photographers can photograph the same subject but tell a different story. This is true for all types of photography.

For example, let’s say you are a sports photographer covering a basketball game. The game is very close; there is a lot of excitement in the game and on the sidelines.

As the clock winds down, another photographer might focus all his attention on the court. But you spot a player on the sidelines, waving a towel to cheer on his team, that captures the emotion of the game even better.

Or let’s say you are hiking in the mountains and see a stream surrounded by lush vegetation.

Another photographer might go with a wide shot, but this seems boring to you. So you find an interesting rock formation to place in the foreground, providing contrast and giving a stronger feel for where you are.

Or perhaps you decide to go with a detail or macro shot instead. Why photograph a whole tree when a single leaf tells your story?

Training Yourself to Notice

  • We should always be looking for pretty light, interesting juxtapositions, leading lines and other visually stimulating subjects.
  • At the same time, we should always be looking for stories to tell.
  • Peer inside a building with unusual windows. See if someone is looking out, or reading a book, or painting.
  • Walk through an old cemetery. Maybe you’ll find someone pressure-washing the headstones.
  • Drive alongside a long, winding white fence. Perhaps you’ll come across a horse being fed by its owner.

Always be observing. Always be looking for interesting subjects, and thinking about what elements would make your photos even better.

The more you do this, the more often you will come across these elements — because you have trained yourself to notice them.

Filed Under: Photography

Photographic Juxtaposition

August 3, 2011

Juxtaposition seems like such a hard word, doesn’t it, but it is a concept quite easily grasped when explained using pictures.

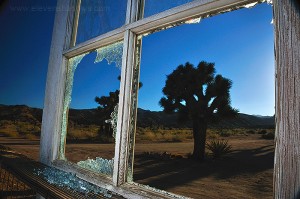
Juxtaposition involves comparing two or more elements within a photograph, bringing out either the similarity or dissimilarity between them. Juxtaposition also can involve contrasting elements. In such cases, we will see elements that are strikingly, and often incongruously, different. We can compare and contrast elements by placing them side-by -side, above or below each other, or layer them in the foreground, middleground and background.

Juxtaposition can play a crucial role in creating expression in incongruity, street photography, landscapes, opposites and contradictions, and layered imagery.

The next time you see a grand mountain or large monument or building you want to shoot, try to think of how you can further the idea of that grand subject with juxtaposition. For example, something into the foreground can help create the feeling or idea you’re trying to get across. In a grand landscape scene, try to look for something small in the foreground to place in contrast to the large mountain in the background. Look for something that tells the story of the place, such as a river leading into the scene or boulders that are slowly falling off the face of the mountain and are destined to become pebbles at the bottom of the stream.

Filed Under: Photography

The Art of Selective Color Photography

July 26, 2011

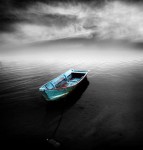
Selective color is a post-processing technique where most of a photo is converted to black and white, but some parts are left in color. This is usually achieved by using layers and masks in photo editing software (Photoshop, SilverFast, Adobe Fireworks or The GIMP for example). This technique is often over-used. Use it to  enhance your composition storytelling, not to merely demonstrate that you know the technique.

Here’s a link with some more great inspirational selective color photographs

Filed Under: Photography

  • « Previous Page
  • 1
  • 2
  • 3
  • 4
  • …
  • 9
  • Next Page »

Delivering Customer Experience Excellence

Let's give em' something to talk about!

Contact Us

Copyright © 2025 · Archimedia Studios · Privacy Policy